This is a second post in a matter of days and although I like the new App model I must admit I am far from impressed on its current stabilitly and apparent frailty when compared to regular packages.
Aside from the dependancy in and around Build & Captures, at present the revision history seems to play potential havoc inside of Task Sequences in certain instances as outlined below:
When building a machine from a Task Sequence, an application (or multiple) will fail and produce what is apparently an access denied message (0x80004005) however the NA Account is configured correctly and all boundaries are in place.
The source of the issue can be traced to the revision history in the Task Sequence being referenced to an incorrect version causing the install to fail.
This explanation is detailed in this excellent post
Although I like the new App model I feel it has some way to go before moving away from Packages all together.
Since the release of ConfigMgr 2012 Microsoft has employed a more dynamic approach towards application delivery in the form of Applications as opposed to standard Packages. These work in a similar way but come into their own for more complex applications requiring dependancy and being able to determine the presence on a machine rather than using scripts etc.
Although I use these for alot of customers I must admit there are instances where I still prefer the older model as there are advanced elements of troubleshooting where they are easy to get to an issue but also the stability of the platform still does not seem to have been ironed out.I have had countless instances where packages of the same source work fine but produce unrelaible results when working inside of OSD.
Nice lead onto topic 🙂
For one client I decided to move the Build & Capture over to pure applications where possible as opposed to packages and stumbled over an instability when producing the build and capture where they would not install.
Now I try to follow my own rule of thumb/best practice for Gold Deployment which is as follows
VM (Hyper-V)
Non-domain joined during sequence
This scenarion for a package version of the TS works a treat with no issues however transitioned to applicaiton it failed as soon as it hit the first package.
so what options are availible????
The cleanest option I have used to remediate requires a couple of adjustments:
1 – On the Setup Windows and ConfigMgr step, add in the SMSMP=YouCMbox.FQDN
2 – While I was performing the Build and Capture I added in an IP Address Boundary into the boundary group where the contents was located.
This resolved the issue and allowed the Applications to install.
So why is this required?
Well…… Assuming you dont join the domain during the Build & Capture and then Dis-Join (which is an option, just place in an OU with no policies!), the client is unable to query AD for the vital MP information so it needs to be spoon-fed with all the information it would otherwise gather on its own and without that information it is unable to access the Applications.
This issue is not a problem for standard packages which is just a number of differences between the two.
Ill admit im yet to be completely sold on Applications but will endeavour to try to adopt the new practices wherever possible 🙂
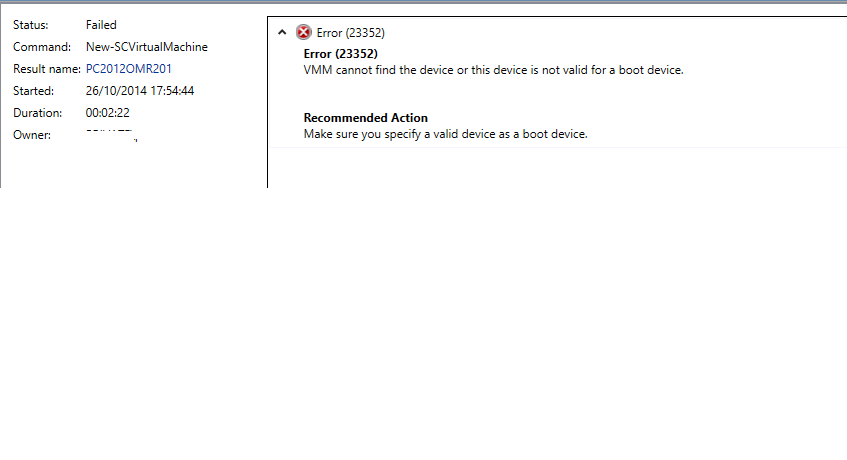
When creating a new VM in Virtual Machine Manager 2012 R2 from a Generation 2 template you may receive the following error:
The issue occurs because the Bootmgfw.efi file is set as the first startup device that the VM tries to start from, instead of the .vhdx file which contains the operating system.
To resolve the issue for the template going forward the following Powershell Script can be executed.
To replicate how storage is presented in a production scenario inside of a LAB, there are some useful Software SAN Tools (Starwinds etc) which present storage to VMM in order to import into the Fabric using iSCSI for example.
Now in Server 2012 R2 this can be achieved right out of the box using the iSCSI Target Server and Powershell to present into VMM.
Ensure your host is Server 2012 R2 and add the feature for the iSCSI Target Server.
Note down the drives you wish to make use in your environment but for the purpose of this post, I have 2 drives that are SSD which I will use as Gold and Silver Storage.
The SMI-S piece that did ship with VMM is no longer required in R2 as its their Out of the box.
We will now go through the steps via Powershell to bring these disks under the control of VMM.
Add a storage provider
Obtain the iSCSI Target Server local administrative credentials that are based on user name and password as follows:
$Cred = Get-Credential
Note*- Any account that is part of the Local Administrators group is sufficient.
The purpose of this article is to give a overview of setting up VMM 2012 R2 in a POC / Lab environment for evaluation or if you are like me as the foundation to building your Private Cloud.
Note* – It is not recommended that this architectural design should serve a production environment.
For most environments a VMM Server along with an accompanying SQL Server will suffice. If you intend to build many machines you may well want to ensure you have ALOT of storage!
Servers: VMM Host | SQL Host (Could exist on same box if this needed)
Service Accounts: VMM Service Account
SQL Service Account
VMM Admin Group (Place Service Account in this group)
VMM Server Prerequisites:
>Windows 8.1 ADK – http://www.microsoft.com/en-us/download/details.aspx?
>VMM Admin Group as a local admin on all hosts
1. SQL Server Setup:
On the SQL database server, install SQL 2012 with SP1.
-This is not a best practices for SQL configuration. Consult your DBA team to ensure your SQL deployment is configured for best practice in your environment.
-Run setup, choose Installation > New Installation…
-When prompted for feature selection, install ALL of the following:
-Database Engine Services
Note*
-If you are going to be deploying a shared SQL server for other System Center components, you might consider adding:
-Full-Text and Semantic Extractions for Search
-Reporting Services – Native
-Management Tools for administration – Basic and Complete
-On the Instance configuration, choose a default instance, or a named instance. Default instances are fine for testing and labs.
-On the Server configuration screen, set SQL Server Agent to Automatic.
-Use a Domain account for the service account.
-Input the DOMAIN\[SQL Service Account] account and password for Agent, Engine, and Reporting.
-On the Collation Tab – you can use the default which is SQL_Latin1_General_CP1_CI_AS or choose another supported collation.
-On the Account provisioning tab – add a domain user account or a group you already have set up for SQL admins.
-On the Data Directories tab – set your drive letters correctly for your SQL databases, logs, TempDB, and backup.
-On the Reporting Services Configuration – choose to Install and Configure. This will install and configure SRS to be active on this server, and use the default DBengine present to house the reporting server databases. This is the simplest configuration.
-Setup will complete.
-For the POC Windows Firewall will be disabled. If you wish to use Window firewall reference – http://msdn.microsoft.com/en-us/library/ms175043.aspx
2. VMM Setup
-Log on using your domain user account that is a member of the SCVMMAdmins group.
-Run Setup.exe
-Click Install
-Select: VMM Management Server
VMM Console
-On the Product Registration – input a product key, otherwise the evaluation product will be installed. Click Next.
-Accept the license agreement and click Next.
-Configure the Customer Experience settings, and click Next.
-Configure to use Microsoft Update or note, click Next.
-Accept or change the default install path and click Next.
-If you get any Prerequisite errors – resolve them.
-On the Database Configuration screen, enter in the name of your SQL database server and leave port blank.
-You can leave “use the following credentials” blank if you are installing to the local SQL server.
-You can enter credentials here to connect to a remote SQL server if your user account you are running setup as does not have enough rights over the instance to create a database.
-Select the Instance Name to install to. Ensure “New Database” is checked and use the default name or change it to suit your naming standards. Click Next when this screen is complete.
-On the Account Configuration screen, enter the domain account for the SCVMM service account that we created earlier.
-Leave the default to store encryption keys locally for this simple deployment.
-These can be stored in AD although: http://technet.microsoft.com/library/gg697604.aspx
-Click Next.
-On the Port configuration screen, accept defaults and click Next.
-On the Library configuration screen, change the library path or accept the default location, and click Next.
-Click Install.
Setup will install all roles and complete.
Once installed your ready to start putting the components together ready to build your Private Cloud!!!!!
Although it has only just hit technical preview, I have decided to switch my Win 8.1 Hyper-V host over to Windows 10 while testing out new OSD Deployments via ConfigMgr 2012 to see how it fairs.
On the whole it stands up pretty well but one thing I did notice was on my Task Sequence the network adapter I had for the Win 8 Hyper-V host did not work on the Win 10 host and therefore the build failed.
I was unable to locate a .ISO on the tech preview to extract the driver which installed as part of the OS so I used the following useful tool:
http://www.boozet.org/dd.htm
The Driver download tool (once installed on a Windows 10 VM inside Hyper-V) allowed me to extract the Hyper-V driver I required and from there I could import this into ConfigMgr and add to my Hyper-V driver package. As you will see below the version of the NIC driver is 6.4 which is (at present) the build type for Windows 10
I would not recommend this for Production Build & Captures incase it layers any untoward issues from a network driver perspective but as a funtioncal build test platform it has held up well so far!
Since the release of System Center 2012 R2 there have been (to date) 3 Cumulative Updates which if you wish to keep your clients upto date will need deploying into your ConfigMgr hierarchy.
During the OSD Process the most common place you will see this is below:
This can sometimes be problematic and prone to issues however there is another way…………
Note * The below has not had an official stamp off from Microsoft so please test and use at your own risk however this has worked since 2007 and I have not experienced any known issues.
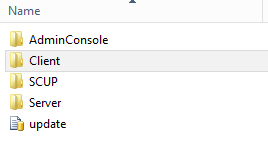
After completing the installation of the CU on your site Server you will have the hotfix files placed in the following area:
\\[Site Server\SMS_[Site Code]\hotfix\[Hotfix KB]
Within the directory will be the packages you have decided to install.
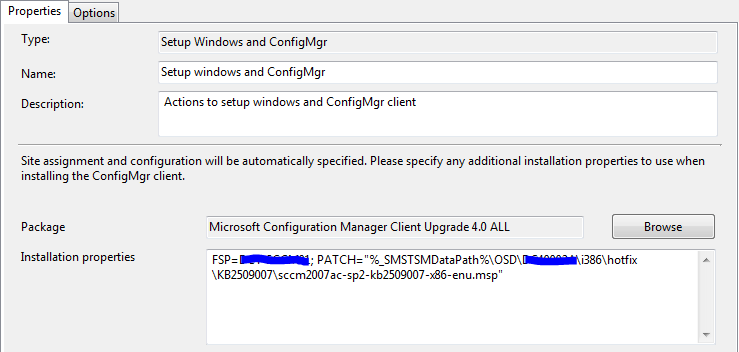
If you drill into the ‘Client\[Platform]’ directory you will find the .MSP file in this case CU3 for ConfigMgr 2012 R2
Launch a new explorer Window to where the package for you ConfigMgr Client is (Default = \\[Site Server]\SMS_[SMS Site Code]\Client
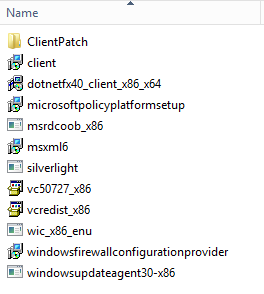
Within this directory are the x64 and i386 folders respectivly.
For the example, drill into the i386 Folder and create a ‘ClientPatch’ Folder in this directory:
Now copy the MSP into this directory
Repeat this for the x64 directory ensuring you copy the right MSP into the right folder!
Simply update the package for your ConfigMgr Client Agent and your good to go 🙂
Note* – It may be worth performing the last action out of hours as it may interupt a newly initiated build process!
With the ease at which ConfigMgr 2012 makes slipstreaming updates into an Image, that is both faster and negates the need for a technician VM it is hard going back to 2007 when updates are required to layer on top of a core WIM.
Since Microsoft did not release SP2 of Windows 7, anyone who has tried to keep a pure gold vanilla build (essentially a Win 7 CD) and layer updates on top would have hit the max 87 updates threshold for the step in the Task Sequence a long time ago so you need to be creative with how you reach your end goal.
One Option I have used when on client site with a GOLD WIM full of apps etc and no build and capture insight and miles out of compliance with updates is the method below:
1) Create a Software Update Package with all the updates you would like to inject into the WIM.
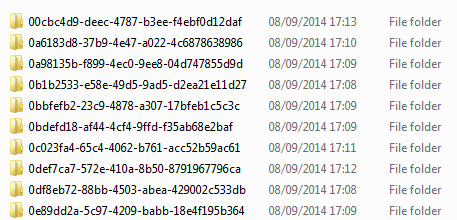
2) Once the updates have been downloaded copy the entire contents of the package down onto a technician PC. The updates will look something like the below:
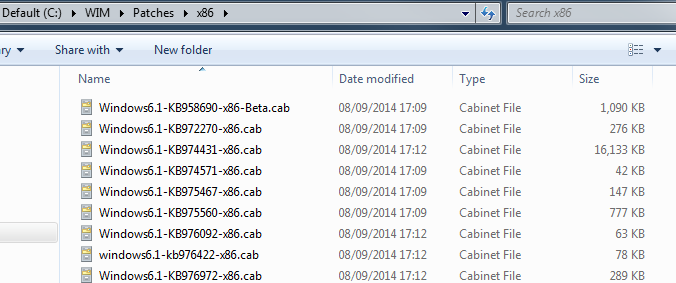
3) With these on your reference machine, inside each of these folders are .cab files for the updates. I extracted these into 2 folders x86 & x64 and then removed the other folders.
Example below:
I then proceeded to create a folder structure including the WIM I wanted to mount and inject along with the update directories as shown below (as you can seem the client has created a VERY LARGE core WIM!):
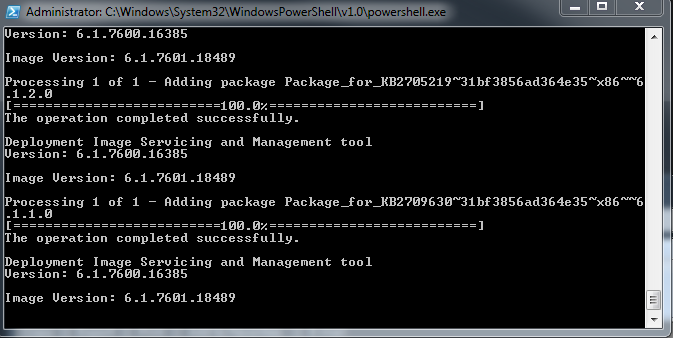
With all this in place you can then use the below Powershell script to add in all of your updates.
*Note – Save the file as a .ps1 with your other items for cleanliness!
**Note – Items highlighted will depend on your environment so ensure you adjust as necessary
Fairly common issue when you have an unsuspecting GPO in your environment taking some precendence over ConfigMgr. Well what if you dont have one????
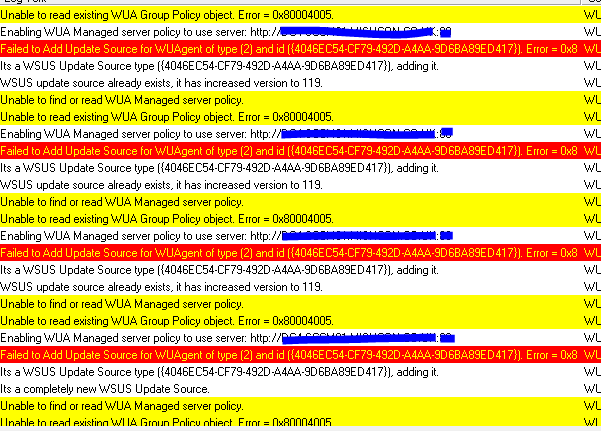
Working on a piece of work for a client who had around 3% of their clients reporting as ‘Compliance Unknown’ and this error was reported in WUAHandler.log
After ruling out anything to do with ConfigMgr and a Group Policy applying it turned out that there was a ‘jammed’ GPO policy on the end client which was resolved by deleting the following file:
As this was a machine setting after this was cleared and the machine restarted to force a policy update from a DC, the next time a Software Update Scan was initiated the Software update cycle began and on the Software Evaluation cycle the updates began to install!